Help: Groups — Adding & Switching
How to Create your First Group (Educators Only)

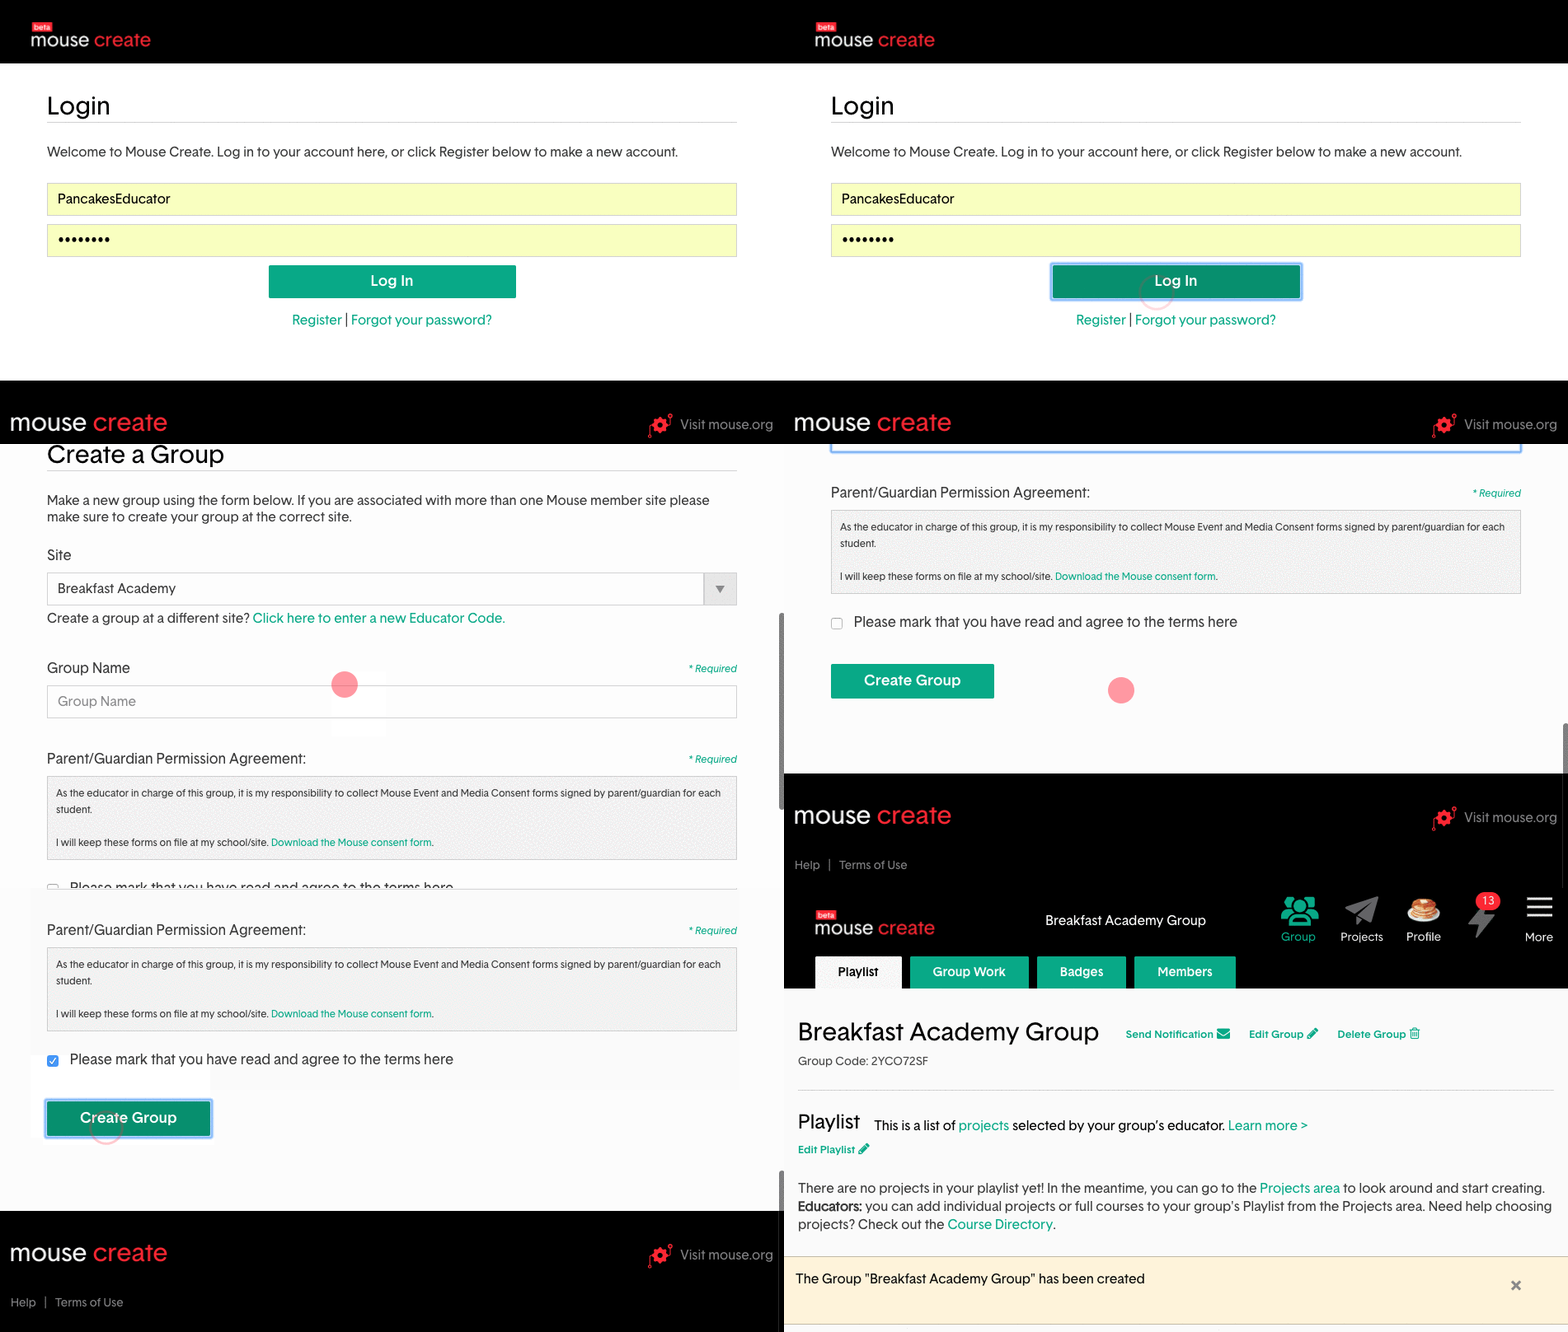
After creating a new educator account, and entering your Educator Code, you will have 2 choices– Join a Group or Create a Group:
- Scroll down the page to fill in the "Create a Group" form.
- Name your Group, review, check the Permission Agreement, and click the button to create your first group!
- You will automatically become the “Group Manager” for all groups you create. Learn more about this role here.
- The playlist on your Group page will be empty until you add projects.
Your group name must be unique across all groups on Mouse Create. If you try to create a group and receive an error message, please try again using a more unique group name. We are working on making this error message more user friendly.
Joining an Existing Group: If you do not want to start your own group, you can also join an existing group that was created by a different Mouse educator. You will need that group’s Group Code to join. The Group Manager within the group you wish to join can find the Group Code underneath the group’s name on the group page. To join, go to the More menu in the upper right corner and select “My Groups”. Choose the “Add Group” button. Enter the Group Code into the “Join a Group” form.
Becoming a Group Manager of an Existing Group: If you would like full access to edit and manage a group that you did not create yourself, the Group Manager can give you “Group Manager” status from the “Actions” section of the “Members” area. Once you have been made a Group Manager you will have full access to manage the group’s playlist and students.
Joining or Creating Multiple Groups

If you are working with various classes or clubs, you can create or join multiple groups.
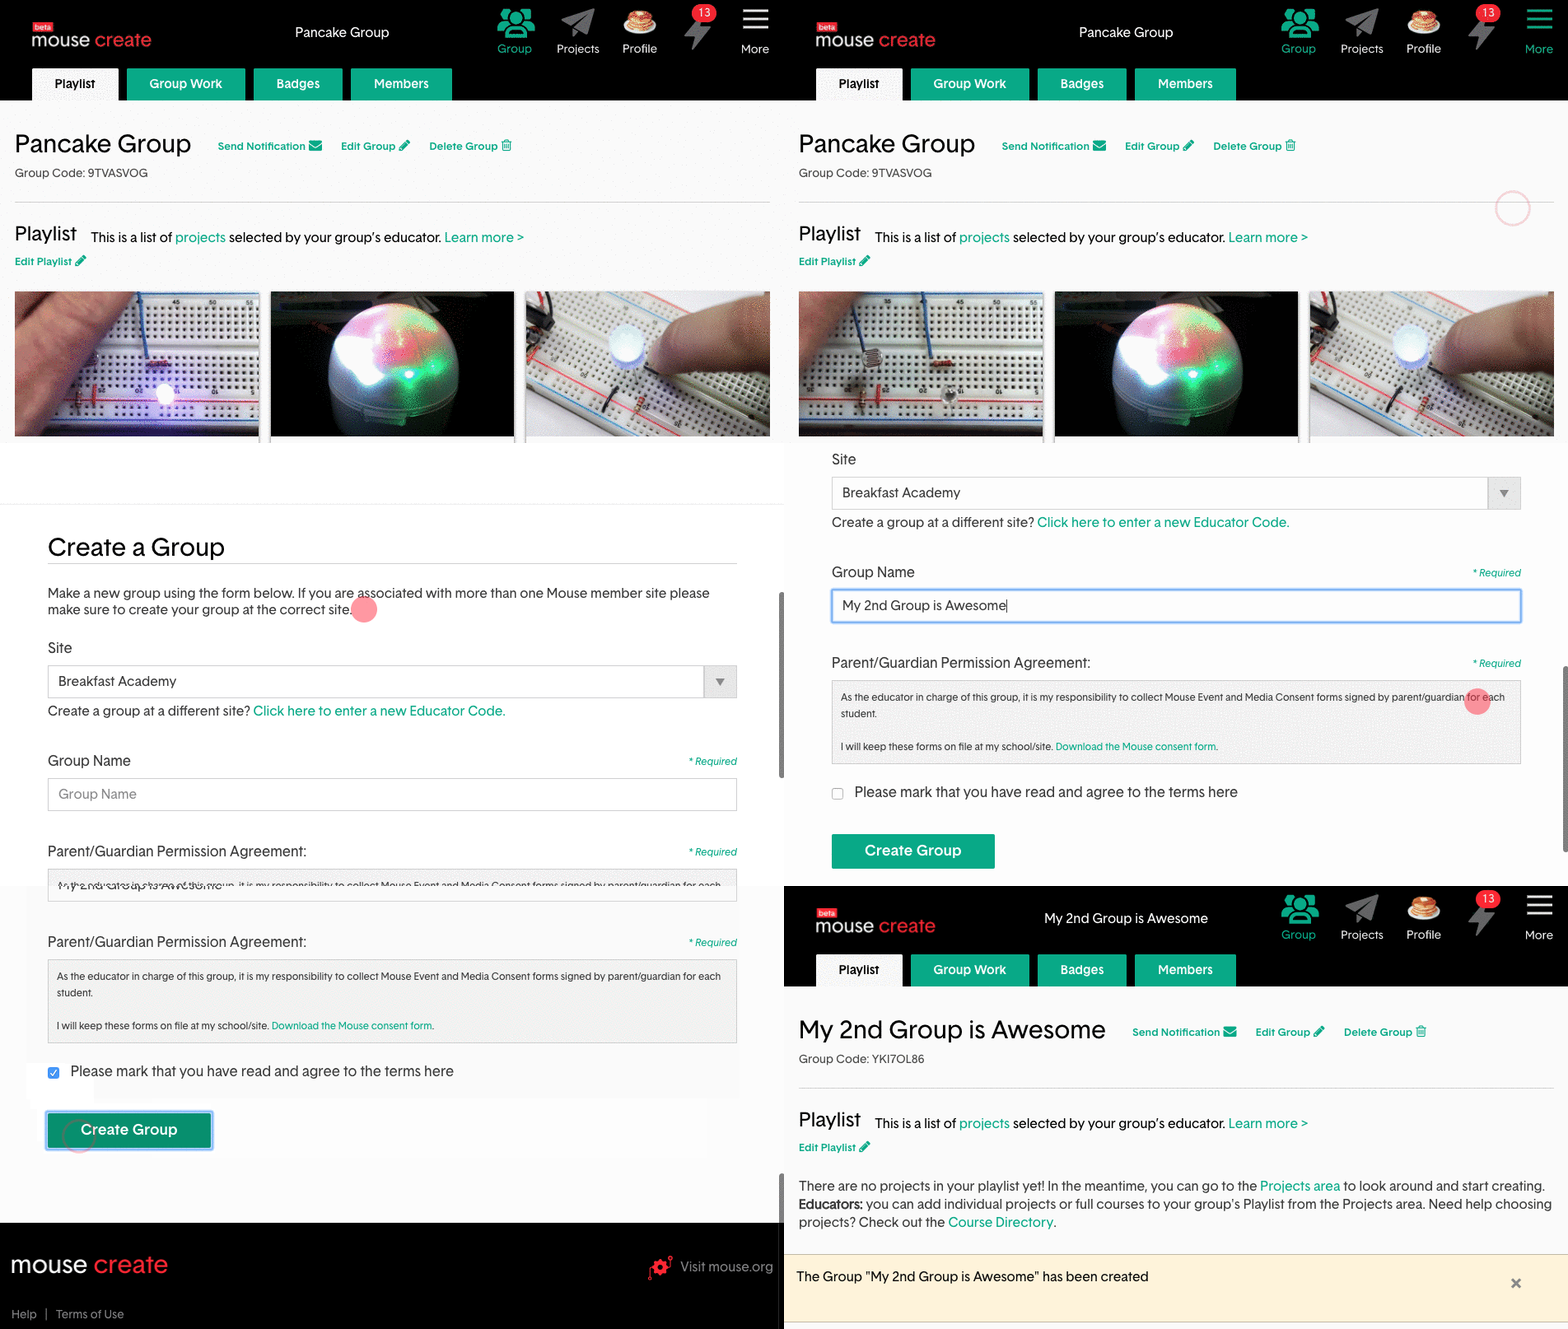
- Select the "More" button from the top menu and go to "My Groups".
- Below your original group name, select "Add Group"
- From here you can join a group with a Group Code, or educators can scroll down to create another group by filling out the form.
- When creating a new group, make sure that the site listed above the Group Name is the site you want the group to be associated with. If you do not see the correct site listed please see the instructions below.
If you are working with multiple sites or have moved from one Mouse member site to another you will have to enter the Educator Code for the second site to create groups associated with that site. The site associated with a group is very important you and your group members could lose access to Mouse Create if the other site drops out of the program.
- On the Create a Group form click the link that says, “Click here to enter a new Educator Code."
- Enter the Educator Code for your second site
- Now on the Create a Group form you will be able to select the correct site.
Switch your Active Group
If you are in multiple groups on Mouse Create, you must select an active group each time you log in. All work you do is associated with your active group. To switch your active group:
- Select the "More" button from the top menu and go to "My Groups".
- Select one of your groups to make that group active.
- From here you can join a group with a Group Code, or educators can scroll down to create another group by filling out the form.
Changing the Name of a Group
To change the name of a group click on the “Edit Group" link from any tab of the Group page. To save the new name of your group click the “Edit Group" button.
Your group name must be unique across all groups on Mouse Create. If you try to change the name of a group and receive an error message, please try again using a more unique group name. We are working on making this error message more user friendly.
Sending Group Notifications
To send a notification to all the members of a group click on the Send Notification link from any tab of the Group page. Click the Preview button to preview your notification, then click the Approve & Send button to send your notification.
For more on notifications see the Notifications help page
Deleting a Group
To delete a group click the Delete Group link from any tab of the Group page, then click Ok on the popup that appears.
Warning:
Before deleting a group it is a good idea to review any work and award any pending badges.
Deleting a group is permanent. Student connections to that group will also be deleted, and any students who are only in that group will no longer have full access to Mouse Create until they join another group.
Student work that was submitted to a deleted group is still available on their profile and in the Project Gallery (if they added it), however, unreviewed work is no longer available to be reviewed. Pending badges in a deleted group are not awardable.