Help: Groups — Member Management
Adding Students to your Group
- After students register new accounts, they will be asked to enter a Group Code to get access to Mouse Create.
- Login to Mouse Create with your educator account.
- If you are a member of multiple Groups select the Group you want to add students to.
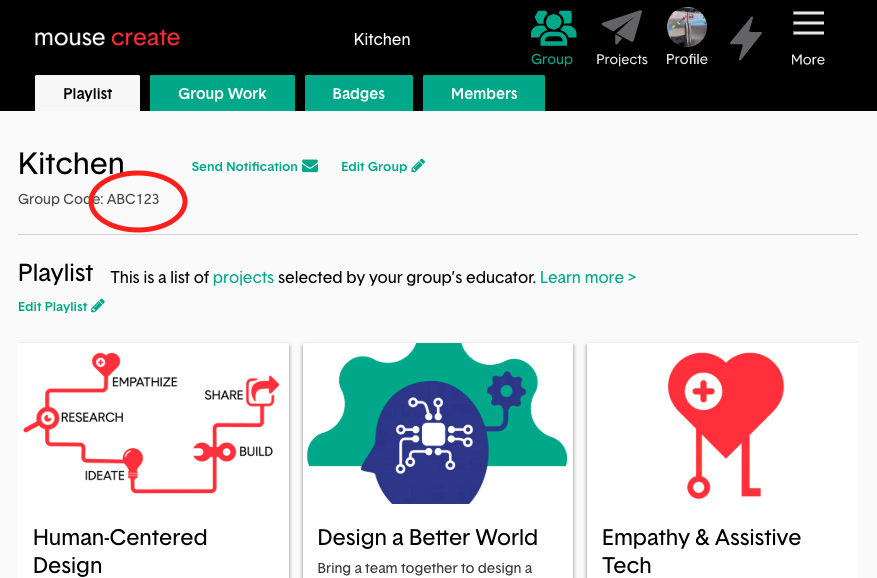
- Click the Group button in the top menu to get to your Group page.
- Find the Group Code under the name of your group.
- Share this Group Code with your students. Note: the code is not case sensitive.
- Students can add the group code by going to the "My Groups" page in the "More" menu in the top right corner of Mouse Create.
- From the "My Groups" page, they should click the "Add Group" button and enter your Group Code in the "Join a New Group" form.
The group code for this group is shown below the group name. It is "ABC123".
About the Members Table
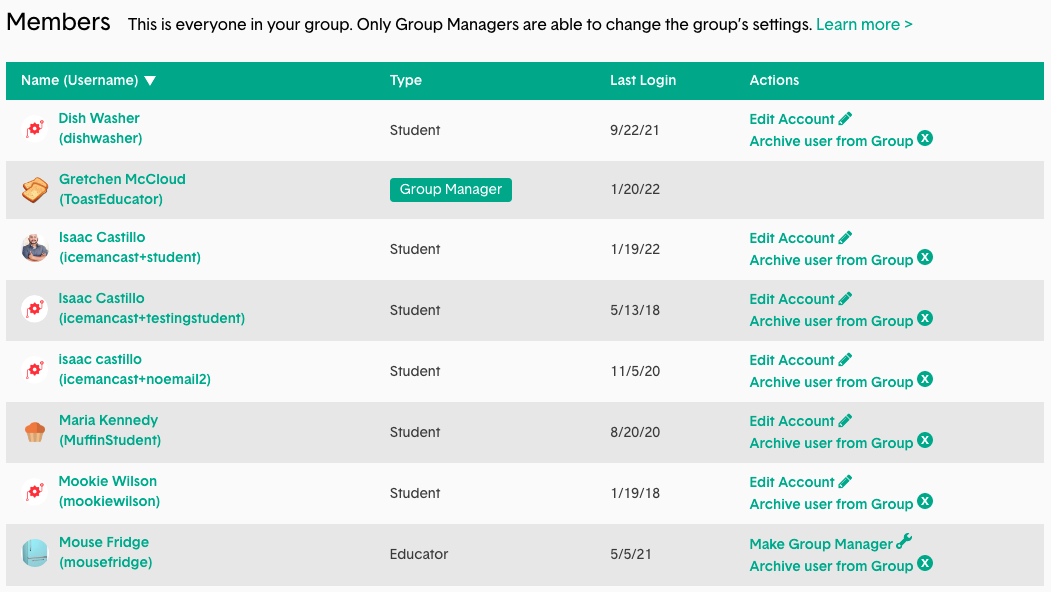
- Name (Username): Shows each group member’s avatar, their real name, and their Mouse Create username in parentheses.
- Type: Shows which members are students, educators, or group managers. Only Group Managers are able to edit the settings of the group. By default, the educator who created the group is the “Group Manager”.
- Last Login: Shows the date each group member last logged in to Mouse Create.
- Actions: Group Managers can see links to edit student accounts, to archive members from the group, and to give group manager status to another educator account. For students, and educators without group manager status, this area shows “None".
Group Membership Types: Managers, Educators, and Students
Group Manager: This role is given to the educator who first created a group and can be assigned to other educators who join the group. Group Managers can:
- Change the name of the group
- Delete the group
- Share the group code for students and educators to join
- Add/remove projects in the group playlist
- Review student work
- Award badges
- Get notifications about the group
- Edit student group members accounts
- Add/remove “Group Manager” status for other educators in the group
*All group members (students and educators) can:**
- View projects in the group playlist
- Submit work to the group
- Add other group members as collaborators on work they submit within the group
- View work submitted by all group members from the “Group Work” area
- Add comments on any member’s work submitted to the group
- Receive notifications about their own work in the group
- Receive badges
- View the “Members” area
- View the profile pages of other group members
- Edit their own account settings
- Note: Educators who join a group they did not create have no special privileges unless they are given “Group Manager” status by the person who created the group.
Editing Students’ Accounts: Passwords, Usernames and Emails
Group Managers in the same group as a student can change that student’s password, username, email address, avatar or bio. To edit a student account:
- Go to the Members tab of the group page.
- In that student’s row in the Members table, click the “Edit Account" link in the Actions column.
- After making changes to the student’s account click the Update Profile button at the bottom of the page to save changes.
Archiving Students from your Group
When a student is no longer participating in your Mouse group, you can archive them on Mouse Create. To archive a student from your group:
- Go to the Members tab of the group page.
- In that student’s row in the Members table, click the “Archive user from Group" link in the Actions column.
- If this student is in no other groups on Mouse Create, they will no longer be able to access your group, or submit projects.
What happens when you archive a student? Work previously submitted by archived students will still appear in the Group Work table, and badges earned by archived students will still appear in the Badges table. Archived students are no longer able to be selected as collaborators by other group members. If a student is archived from the only group they are a member of they will no longer have full access to Mouse Create until they join another group.
To unarchive a student from a group click on the “Manage archived users" link at the bottom of the Members table. Next, click on the “Change Status" link in the that student’s row in the Manage Archived Members table. Then, in the popup that appears change that student’s status from “Archived" to “Active", then click the “Update Status" button.